```html
Light Replacement for Ceiling Fans: A Comprehensive Guide
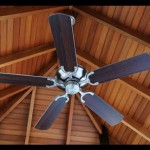
Ceiling fans are a common fixture in many homes, offering both cooling and lighting benefits. However, the light fixture component of a ceiling fan can sometimes malfunction, become outdated, or simply not provide the desired level of illumination. Replacing the light fixture on a ceiling fan can be a cost-effective alternative to replacing the entire unit, allowing homeowners to upgrade the aesthetics and functionality of their existing fan.
The process of replacing a ceiling fan light fixture involves several steps, from selecting a compatible replacement to safely disconnecting the old fixture and installing the new one. This article will provide a comprehensive guide to light replacement for ceiling fans, covering key considerations, safety precautions, and installation procedures.
Compatibility and Selection of Replacement Lights
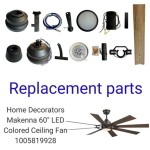
Before initiating the replacement process, it is crucial to determine the compatibility of the new light fixture with the existing ceiling fan. Many ceiling fans are designed to accommodate specific types of light kits, and incompatibility can lead to electrical problems or physical instability. The first step is to identify the model number of the ceiling fan, typically located on the motor housing or in the original documentation. This information can then be used to consult the manufacturer's website or contact customer support to verify compatible light kits.
Several factors influence the compatibility of a light fixture with a ceiling fan. These include the mounting mechanism, the electrical wiring configuration, and the wattage limitations. The mounting mechanism refers to how the light fixture attaches to the fan housing. Some fans use a simple screw-on mechanism, while others require a more complex bracket system. The replacement light fixture must be designed to interface with the existing mounting mechanism to ensure a secure and stable connection. The electrical wiring configuration must also match, ensuring that the wires from the fan are compatible with the wiring of the new light fixture. Finally, the wattage limitations of the fan must be considered to prevent overloading the electrical circuit. Exceeding the recommended wattage can lead to overheating and potential fire hazards.
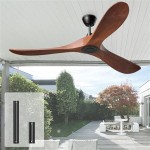
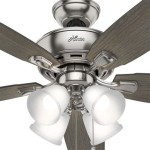
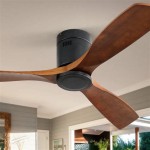
Beyond compatibility, homeowners should also consider the desired style and functionality of the replacement light fixture. Numerous options are available, ranging from simple globe-style lights to more elaborate multi-light fixtures with shades or diffusers. The choice will depend on the aesthetic preferences of the homeowner and the desired level of illumination. LED light kits are increasingly popular due to their energy efficiency and long lifespan. They also offer a variety of color temperatures and brightness levels, allowing homeowners to customize the lighting to their specific needs.
When selecting a replacement light fixture, it's beneficial to consider the accessibility of replacement bulbs. Some fixtures utilize proprietary bulbs that may be difficult to find or expensive to replace. Opting for a fixture that uses standard bulb sizes, such as A19 or E26, can simplify future maintenance and reduce costs.
Safety Precautions and Preparations
Electrical work can be hazardous, and safety precautions are paramount when replacing a ceiling fan light fixture. Before commencing any work, it is essential to disconnect the power to the ceiling fan at the circuit breaker. This will prevent accidental electrocution. To ensure the power is off, use a non-contact voltage tester to verify that no voltage is present at the ceiling fan's wiring.
In addition to disconnecting the power, it is advisable to wear appropriate safety gear, including safety glasses to protect the eyes from debris and gloves to insulate against electrical shock. A sturdy ladder is necessary to reach the ceiling fan safely. Ensure the ladder is placed on a level surface and is stable before climbing. If possible, have a second person assist with holding the ladder and passing tools.
Before removing the existing light fixture, take photographs of the wiring connections. This will serve as a reference when connecting the new light fixture, ensuring that the wires are connected correctly. Incorrect wiring can result in malfunctions or electrical hazards. Organize the necessary tools within easy reach, including a screwdriver set, wire strippers, wire connectors, and electrical tape. Having all the required tools readily available will streamline the installation process and minimize unnecessary trips up and down the ladder.
Carefully inspect the ceiling fan's wiring for any signs of damage, such as frayed wires or cracked insulation. If any damage is detected, it should be repaired before proceeding with the light fixture replacement. Damaged wiring can pose a fire hazard and should be addressed by a qualified electrician.
Step-by-Step Installation Procedures
With the safety precautions in place and the necessary preparations completed, the installation of the new light fixture can begin. The following steps outline the general procedures for replacing a ceiling fan light fixture. However, it is important to consult the manufacturer's instructions for both the ceiling fan and the new light fixture, as specific steps may vary depending on the model.
1.
Remove the Old Light Fixture:
Carefully unscrew or detach the existing light fixture from the fan housing. Depending on the design, this may involve removing screws, nuts, or clips. Once the fixture is detached, gently lower it and disconnect the wiring. Using the photographs taken earlier as a reference, detach the wires one at a time, using wire strippers to expose fresh wire if necessary. Cap the exposed wires with wire connectors to prevent accidental contact.2.
Prepare the New Light Fixture:
Unpack the new light fixture and inspect all components for any damage. Read the manufacturer's instructions carefully to understand the assembly process. Identify the wires that will be connected to the ceiling fan's wiring. Typically, there will be a black wire (hot), a white wire (neutral), and a green or bare copper wire (ground). Some fixtures may have additional wires for controlling specific functions, such as dimming or color temperature.3.
Connect the Wiring:
Carefully connect the wires from the new light fixture to the corresponding wires from the ceiling fan. Use wire connectors to securely join the wires, twisting them together tightly and then screwing on the wire connector. Ensure that the connections are tight and secure. Gently tug on each wire to verify that it is firmly connected. Wrap the wire connectors with electrical tape for added insulation and security. The black wire from the light fixture should be connected to the black wire from the fan, the white wire to the white wire, and the green or bare copper wire to the green or bare copper wire. If the wiring configuration is unclear, consult a qualified electrician for assistance.4.
Mount the New Light Fixture:
Carefully align the new light fixture with the mounting mechanism on the ceiling fan. Secure the fixture using the appropriate screws, nuts, or clips, ensuring that it is firmly attached to the fan housing. Double-check that the fixture is level and stable before proceeding.5.
Install the Bulbs and Shades:
Install the recommended bulbs into the new light fixture. Use the correct wattage bulbs as specified by the manufacturer to prevent overheating. If the fixture includes shades or diffusers, attach them according to the manufacturer's instructions. Ensure that the shades are securely attached and properly aligned.6.
Restore Power and Test:
After completing the installation, carefully restore power to the ceiling fan at the circuit breaker. Turn on the light switch to test the new light fixture. If the light does not turn on, double-check the wiring connections and ensure that the bulbs are properly installed. If the light flickers or exhibits any other unusual behavior, immediately disconnect the power and consult a qualified electrician.7.
Final Inspection:
Once the light fixture is functioning correctly, perform a final inspection to ensure that all components are securely attached and that there are no loose wires or exposed connections. Clean up any debris or tools from the work area. The light replacement process is now complete.Proper disposal of the old light fixture and any unused wiring is essential for environmental responsibility. Consult local regulations for appropriate disposal methods for electronic waste.
```
4 Ways To Replace A Light Bulb In Ceiling Fan Wikihow

How To Choose A Light Bulb For Your Ceiling Fan

Ceiling Fan Light Bulbs Led Lights

6 Led Ceiling Fan Lights Replacement Ultra Thin Retrofits Kit 6000k Daylight Ebay

Diy Ceiling Fan Makeover Add Cage Bulb Guards And Edison Bulbs John Took Down I Spray Painted To

Brushed Nickel Vintage Cage Led Ceiling Fan Light Kit 19r81 Lamps Plus

4 Ways To Replace A Light Bulb In Ceiling Fan Wikihow

The 7 Best Ceiling Fan Light Bulbs Reviews Buying Guide Electronicshub

Hampton Bay 11 In Warm And Bright White Light Universal Led Ceiling Fan Kit 53701101 The Home

Ceiling Fan Glass Cover Removal Light Bulb Dome Youtube