How To Fix Ceiling Water Damage
If you have water damage on your ceiling, it's imperative to take action promptly to prevent further damage and protect the health of your home and its occupants. Follow these steps to fix ceiling water damage effectively:
1. Identify the Source of the Leak:
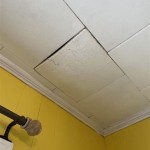
Determine the exact location where the water is leaking from. Check for any visible holes, cracks, or stains on the ceiling. Inspect the roof, gutters, and plumbing fixtures above the damaged area for potential leak points.
2. Stop the Water Flow:
If the water is still actively leaking, take immediate steps to stop the flow. Turn off the main water supply if the leak originates from plumbing. If the leak is due to a roof breach, cover the damaged area with a tarp or plastic sheet as a temporary solution.
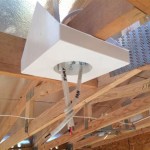
3. Remove the Damaged Ceiling:
Once the water flow is stopped, remove the affected ceiling material. Use a utility knife or pry bar to carefully cut and remove the damaged drywall, plaster, or other ceiling material. Be cautious not to damage any electrical wires or plumbing lines during the removal process.
4. Dry the Area:
Use fans, dehumidifiers, or both to thoroughly dry the affected area. Ensure proper ventilation by opening windows and doors to facilitate airflow. Allow the area to dry completely before proceeding with repairs to prevent mold growth and further damage.
5. Repair the Source of the Leak:
Once the affected area is dry, address the underlying cause of the water leak. If the leak originates from plumbing, tighten loose connections, replace faulty fixtures, or repair damaged pipes. If the leak is due to a roof issue, contact a qualified roofing professional for repairs or replacement.
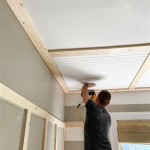
6. Install New Ceiling Material:
After the source of the leak is repaired, install new ceiling material to replace the damaged section. Use drywall, plaster, or other suitable materials appropriate for the type of ceiling. Ensure a proper fit and secure the new material firmly in place.
7. Finish the Repairs:
Once the new ceiling material is installed, finish the repairs by applying joint compound, sanding, and painting or applying a finishing texture to match the existing ceiling. Allow ample time for the repairs to dry completely before using the room normally.
8. Prevent Future Leaks:
To prevent future water damage to your ceiling, consider these proactive measures: Regularly inspect your roof, gutters, and plumbing fixtures for potential problems. Maintain proper attic ventilation to prevent moisture buildup. Address any water leaks promptly to minimize damage and protect the integrity of your home.

How To Repair Water Damage Walls Ceilings True Value Hardware

What To Do If Your Ceiling Has Water Damage

How To Repair Water Damaged Drywall Ceiling Youtube

How To Repair A Water Damaged Ceiling The Home

How To Repair Water Damaged Drywall Ceiling Step By

How To Repair Water Damaged Drywall Ceiling

How To Repair A Water Damaged Ceiling The Home

How To Repair Water Damaged Drywall A Step By Guide Painters Serving Napolis

Water Damage From Flat Above Who Is Liable Red Brick Management

Water Damage Repair Restoration
Related Posts