How To Drape Material From the Ceiling
Draping fabric from the ceiling is a visually appealing way to transform a space. It is frequently employed in event design, interior decorating, and even temporary installations to create a unique ambiance. Whether the objective is to enhance a party atmosphere, soften the architectural lines of a room, or introduce texture and color, understanding the proper techniques and materials is crucial for a successful and aesthetically pleasing outcome.
The process, while seemingly simple, requires careful planning and execution. Considerations include the type of fabric, the hanging method, and the structural integrity of the ceiling itself. Safety is paramount, and one must ensure that the chosen method is secure and will not present a hazard. This article will provide a comprehensive guide to achieve professional-looking draped effects from the ceiling.
Planning and Preparation: The Foundation of Success
Before any fabric is even purchased, meticulous planning is essential. This stage determines the overall aesthetic and ensures that the project progresses smoothly. Accurate measurements are vital for determining the quantity of fabric needed. The dimensions of the room, including its length, width, and height, must be carefully recorded. The desired drape style – whether it’s a swagged effect, a radial arrangement, or a straight drop – will influence the amount of fabric required. It is generally advisable to overestimate slightly, as excess fabric can be trimmed, whereas a shortage can necessitate acquiring more material, potentially disrupting the project flow.
Choosing the right fabric is just as important as taking accurate measurements. The selection should be based on its aesthetic qualities, weight, and fire retardancy. Lightweight fabrics like chiffon and voile create a soft, ethereal look, while heavier fabrics like velvet or satin offer a more luxurious and dramatic feel. For event venues and public spaces, fire-retardant fabrics are often mandated by regulations and are a crucial safety consideration. The color and texture of the fabric should complement the existing decor and the intended atmosphere. Consider the lighting of the space and how the fabric will interact with it. Darker colors absorb light, while lighter colors reflect it, influencing the overall brightness and mood of the room.
The third key element of the planning stage is determining the appropriate hanging method. Several options are available, each with its own advantages and disadvantages. Hooks, eyelets, rope lights and track lighting are all different methods to use when hanging material from the ceiling. The choice will depend on the type of ceiling, the weight of the fabric, and the desired effect. For suspended ceilings, specialized clips designed to attach to the grid system can be used. For drywall ceilings, screw-in hooks or anchors are necessary to provide adequate support. For concrete ceilings, drilling and using concrete anchors may be required. It is crucial to select fasteners that are rated to hold the weight of the fabric and any additional decorations.
Execution: Implementing the Draping Design
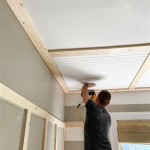
Once the preparatory steps are completed, the execution phase begins. This involves installing the chosen hanging hardware and draping the fabric according to the pre-determined design. Begin by marking the locations for the hooks or anchors on the ceiling, based on the planned drape pattern. Use a level to ensure that the marks are aligned, especially for straight drops or symmetrical arrangements. If using screw-in hooks or anchors, pre-drill pilot holes to make installation easier and prevent damage to the ceiling.
After installing the hardware, begin draping the fabric. For swagged effects, measure and cut the fabric into the desired lengths. Attach one end of the fabric to a hook or anchor, then create a loop or swag by drawing the fabric to the next hook. Adjust the fabric to create the desired fullness and shape. Secure the fabric with pins or ties if necessary. For straight drops, simply attach the fabric to the hooks, allowing it to fall vertically. Ensure that the fabric is evenly distributed and that there are no unsightly wrinkles or creases.
During the draping process, it is important to maintain a consistent tension on the fabric. This will help to prevent sagging and ensure that the drapes maintain their shape. Regularly step back and assess the overall effect, making adjustments as needed. Pay attention to the details, such as the way the fabric falls and the symmetry of the arrangement. If using multiple pieces of fabric, ensure that they are properly aligned and that the seams are hidden or artfully concealed.
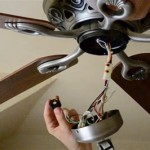
Electrical safety should be always in mind when draping material. Avoid covering or obstructing light fixtures or electrical outlets, as this can create a fire hazard. Ensure that any electrical cords are properly secured and are not at risk of being pulled or tripped over. When working at heights, use a sturdy ladder or scaffolding and take all necessary safety precautions. Having a second person assisting can be helpful, especially for larger projects.
Refinement and Maintenance: Ensuring Longevity and Appearance
After the initial draping is complete, a refinement stage is necessary to ensure that the final product meets expectations. This involves making small adjustments to the fabric, trimming any excess material, and adding any finishing touches. Inspect the drapes for any imperfections, such as uneven lengths or sagging sections. Use pins or ties to secure any loose fabric and to refine the shape of the drapes. If necessary, use a steamer to remove any wrinkles or creases.
The longevity of the draped fabric depends on proper maintenance. Regularly dust or vacuum the fabric to remove any accumulated dirt or debris. For delicate fabrics, consider using a soft brush or a specialized fabric cleaner. If the fabric becomes stained, attempt to treat the stain immediately, following the manufacturer's instructions. Avoid using harsh chemicals that could damage the fabric.
Over time, the fabric may sag or lose its shape. To prevent this, periodically tighten the hooks or anchors and re-adjust the fabric. If the drapes are only intended for temporary use, consider removing them and storing them properly when they are no longer needed. This will help to prevent damage and extend their lifespan. Store in a cool, dry place away from direct sunlight to prevent fading or discoloration.
When removing the fabric, exercise caution to avoid damaging the ceiling or the fabric itself. Carefully detach the fabric from the hooks or anchors, being mindful of any pins or ties that may be present. If using adhesive hooks, follow the manufacturer's instructions for removal to prevent damaging the ceiling paint or plaster. Store the fabric in a protective bag or container to keep it clean and free from dust.
By following these guidelines, one can successfully drape material from the ceiling to create a visually stunning and transformative effect. Proper planning, careful execution, and regular maintenance are the keys to achieving a professional-looking result that will enhance any space or event. Always prioritize safety and take the necessary precautions to prevent accidents or damage.

Diy Ceiling Drapes On A Budget Easy Draping Tutorial

Ceiling Fabric Draping Add A Majestic Touch At Your Venue Canvas Etc

Ceiling Fabric Draping Add A Majestic Touch At Your Venue Canvas Etc

Ceiling Draping Diy Tutorial

Ceiling Fabric Draping Add A Majestic Touch At Your Venue Canvas Etc

Ceiling Draping Diy Tutorial Youtube

How To Decorate Ceiling With Tulle And Lights

Wedding Ceiling Draping Fabric Ideas Rent Hanging Kit 25

Beautiful Ceiling Makeover Diy Fabric Waved Style Tutorial Youtube
:max_bytes(150000):strip_icc()/__opt__aboutcom__coeus__resources__content_migration__brides__public__brides-services__production__2018__02__14__5a84a74325a8c907d4c82920_wedding-draping-ideas-8-bb00f3b764064bcb86777955c11527c5.jpg?strip=all "16 Ways To Use Draping At Your Wedding Reception")
16 Ways To Use Draping At Your Wedding Reception