Understanding the DuraVent Through-The-Ceiling Kit: A Comprehensive Guide
The DuraVent Through-The-Ceiling Kit is a comprehensive package designed to facilitate the safe and efficient venting of heating appliances through a ceiling and roof. This type of venting system is commonly used for appliances such as wood stoves, furnaces, and other heating devices that require a chimney or vent to expel combustion byproducts. The kit provides the essential components needed for a secure and code-compliant installation, eliminating the need to source individual parts separately. This pre-packaged solution simplifies the installation process and ensures compatibility between the various elements comprising the venting system.
The efficacy and safety of any heating appliance are intrinsically linked to the quality and proper installation of its venting system. An inadequate or incorrectly installed system can lead to a multitude of problems, ranging from reduced appliance efficiency and performance to dangerous carbon monoxide leaks and even structural fires. Therefore, understanding the components and installation procedures associated with a Through-The-Ceiling Kit, particularly from a reputable manufacturer like DuraVent, is paramount for both professional installers and homeowners undertaking DIY projects.
DuraVent is a well-established and respected manufacturer in the venting industry, known for producing high-quality, durable, and safe products. Their Through-The-Ceiling Kits are designed to meet or exceed industry standards and building codes, providing assurance that the installed system will function reliably and safely for years to come. While specific components may vary depending on the kit's model and intended application, the core purpose remains the same: to provide a complete and reliable solution for through-the-ceiling venting.
Key Components of a Typical DuraVent Through-The-Ceiling Kit
A standard DuraVent Through-The-Ceiling Kit includes a variety of components that work together to create a complete venting system. These components are carefully designed to ensure proper draft, prevent leaks, and maintain structural integrity. While specific components can vary based on the appliance type (e.g., wood stove, gas furnace) and diameter of the venting pipe, the following are commonly included:
Vent Pipe Sections: These are the primary building blocks of the chimney. Typically, DuraVent kits include several sections of double-wall or triple-wall vent pipe. The type of pipe (e.g., DuraTech, DuraPlus) will depend on the specific kit and its intended application. Double-wall or triple-wall construction provides insulation, which helps to maintain flue gas temperatures and reduce the risk of condensation and creosote buildup. The length of each section is standardized, usually 12 inches, 18 inches, 24 inches, or 36 inches, to allow for flexible configurations.
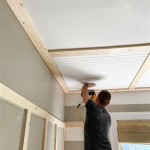
Ceiling Support Box: This critical component provides structural support for the vent pipe as it passes through the ceiling. It also serves as a firestop, preventing the spread of flames and heat to combustible materials in the ceiling and attic space. The ceiling support box is typically constructed from galvanized steel and incorporates insulation to further enhance fire safety. It is important that the ceiling support box is properly sized to accommodate the diameter of the vent pipe.
Attic Insulation Shield: This component is designed to prevent insulation in the attic from coming into direct contact with the hot vent pipe. Contact with insulation can pose a significant fire hazard, so the attic insulation shield creates a necessary air gap. The shield is usually made of metal, such as galvanized steel or aluminum, and is designed to fit snugly around the vent pipe.
Roof Flashing: The roof flashing creates a watertight seal around the vent pipe where it penetrates the roof. It prevents rain, snow, and other weather elements from entering the building. Roof flashing is typically made from aluminum or galvanized steel and comes in different sizes and shapes to match the pitch of the roof. Choosing the correct roof flashing is crucial for preventing leaks and water damage.
Storm Collar: The storm collar is a collar that fits around the vent pipe just above the roof flashing. It provides an additional layer of protection against water intrusion by deflecting rain away from the flashing and the vent pipe joint. The storm collar is usually made from aluminum or galvanized steel and is secured to the vent pipe with sealant.
Rain Cap: The rain cap is installed at the top of the vent pipe to prevent rain, snow, leaves, and debris from entering the chimney. It also helps to prevent downdrafts, which can interfere with the proper functioning of the heating appliance. Rain caps are available in various designs, including single-wall and multi-wall options, and are typically made from galvanized steel or stainless steel for durability.
Connector Pipe (if applicable): Some kits may include a section of connector pipe designed to connect the appliance to the vent pipe. This is particularly common in kits designed for wood stoves or other freestanding heating appliances. The connector pipe must be of the correct diameter and material to ensure a safe and efficient connection.
Hardware and Sealant: The kit also includes the necessary hardware, such as screws, bolts, and clamps, for assembling the components. High-temperature sealant is typically provided to create airtight seals between the vent pipe sections and other components. Using the correct hardware and sealant is essential for ensuring a secure and leak-free installation.
Installation Considerations for DuraVent Through-The-Ceiling Kits
Proper installation is crucial for the safe and effective operation of a DuraVent Through-The-Ceiling Kit. Adhering to the manufacturer's instructions, local building codes, and industry best practices is essential. Failure to do so can result in serious consequences, including fire hazards, carbon monoxide poisoning, and property damage. A thorough understanding of the installation process is critical before commencing any work.
Code Compliance: Before starting any installation, it is imperative to check local building codes and regulations. These codes specify the required clearances to combustible materials, venting heights, and other important safety measures. Failure to comply with local codes can result in fines, rejection of the installation, and potential safety hazards. Consult with your local building official or a qualified HVAC professional to ensure compliance.
Clearance to Combustibles: Maintaining adequate clearance to combustible materials is paramount. Building codes typically specify minimum clearance distances between the vent pipe and nearby combustible materials, such as wood framing, insulation, and roofing materials. The DuraVent kit is designed to provide a certain level of fire protection, but it is still necessary to adhere to the specified clearance requirements. Use appropriate firestops and insulation shields to maintain these clearances.
Proper Venting Height: The vent pipe must extend a sufficient height above the roof to ensure proper draft and prevent downdrafts. Generally, the vent pipe should extend at least 2 feet above the highest point of the roof within a 10-foot radius. Local codes may specify different height requirements depending on the roof pitch and other factors. Insufficient venting height can lead to poor appliance performance and increased risk of carbon monoxide buildup.
Secure Connections: All vent pipe sections and components must be securely connected to ensure a tight and leak-free system. Use the provided hardware and sealant to create airtight seals. Check all connections for tightness and stability. Loose or poorly sealed connections can allow flue gases to leak into the building, posing a serious health hazard. Improper connections can also compromise the structural integrity of the venting system.
Proper Support: The vent pipe must be adequately supported to prevent sagging or movement. Use pipe straps or other support devices to secure the vent pipe to the building structure. The amount of support required will depend on the length and weight of the vent pipe. Inadequate support can lead to stress on the vent pipe joints, increasing the risk of leaks and structural failure.
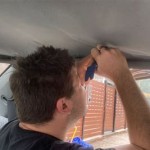
Professional Installation: While some homeowners may be comfortable performing DIY installations, it is often advisable to hire a qualified HVAC professional or chimney sweep for the job. Professionals have the experience, knowledge, and tools necessary to ensure a safe and code-compliant installation. They can also identify potential problems and make necessary adjustments to optimize the performance of the venting system. Hiring a professional can provide peace of mind and ensure that the installation is done correctly.
Choosing the Right DuraVent Through-The-Ceiling Kit
Selecting the appropriate DuraVent Through-The-Ceiling Kit requires careful consideration of several factors, including the type of appliance being vented, the diameter of the vent pipe, the roof pitch, and the local building codes. Choosing the wrong kit can result in compatibility issues, safety hazards, and code violations. It is important to research available options and consult with a qualified professional if needed.
Appliance Type: DuraVent offers different kits designed for specific types of heating appliances, such as wood stoves, gas furnaces, and oil furnaces. Each kit is tailored to the specific venting requirements of the appliance. For example, a wood stove kit will typically include components designed to withstand the higher temperatures and corrosive flue gases associated with wood burning. Ensure that the chosen kit is compatible with the type of appliance being vented.
Vent Pipe Diameter: The diameter of the vent pipe must match the outlet size of the appliance. Using a vent pipe that is too small can restrict airflow and reduce appliance efficiency. Using a vent pipe that is too large can lead to excessive cooling of the flue gases, increasing the risk of condensation and creosote buildup. Consult the appliance manufacturer's instructions to determine the correct vent pipe diameter.
Roof Pitch: The roof pitch affects the type of roof flashing required. DuraVent offers roof flashing in various sizes and angles to accommodate different roof pitches. Using the wrong roof flashing can result in leaks and water damage. Measure the roof pitch accurately and choose the appropriate flashing accordingly.
Kit Contents: Carefully review the contents of the kit to ensure that it includes all the necessary components for the installation. Check the lengths of the vent pipe sections, the size of the ceiling support box, and the type of roof flashing. If any components are missing or incorrect, contact the supplier or manufacturer for assistance.
Material Quality: DuraVent products are known for their quality and durability, but it is still important to inspect the materials before installation. Check for any signs of damage, such as dents, scratches, or corrosion. Ensure that the vent pipe sections are properly insulated and that the seams are tightly sealed. Using high-quality materials will help to ensure a long-lasting and reliable venting system.
Certifications: Look for certifications from recognized testing organizations, such as UL or CSA. These certifications indicate that the kit has been tested and meets applicable safety standards. Using certified products provides assurance that the venting system will perform safely and reliably.
By carefully considering these factors and consulting with a qualified professional, you can select the right DuraVent Through-The-Ceiling Kit for your specific application, ensuring a safe, efficient, and code-compliant venting system.

Duravent Duraplus 6 Diameter Basic Through The Ceiling Kit

Duravent 6ttc Through The Ceiling Kit

Direct Vent Installation Kit Vertical Pro Rockford Chimney

Duravent Cathedral Ceiling Kit With Double Wall Black Pipe Wood Stove Chimney Ccdbkit

Direct Vent Installation Kit Vertical Pro Rockford Chimney

Duraplus Up Through The Ceiling Kit

Duravent Cathedral Ceiling Kit With Double Wall Black Pipe Wood Stove Chimney Ccdbkit

Dura Vent Duraplus Pitched Cathedral Ceiling Support Box Rockford Chimney

Allfuel Hst 6 In X 24 Double Wall Chimney Pipe Through The Attic Starter Kit For 1 12 To Sloped Roof Hst6 Ttak Rc01 24scsrf01 Home

6 In Duraplus Up Through The Ceiling Basic Kit Wood Stove Chimney
Related Posts